Feeds:
Posts
Comments

Posts Tagged ‘dinner’

pupusas with refried black beans and curtido (spicy slaw)

My brother and I made pupusas from this Saveur recipe last summer with our CSA veggies.  Pupusas are El Salvadoran stuffed masa cakes, typically served with a vinegary slaw and tomato sauce.  The Saveur recipe was my first encounter with pupusas, and I really liked the cheesy masa cakes paired with the tangy slaw, called curtido.  I wanted to make them again this summer, but was not eating dairy at the time, so I decided to try a black bean version that is vegan.  It turns out that beans are a traditional filling for pupusas, along with cheese and meat.  Alas, I failed at stuffing the black beans into the masa cakes, but, undaunted, I just decided to spread them on top of plain masa cakes and top with the curtido.  They turned out quite tasty, though since they weren’t stuffed with anything they probably aren’t technically pupusas. They are pretty simple to make, so you should give them a try if you want to add a Latin American dish to your arsenal.

I doubled the amounts of the slaw ingredients, because we can all use more veggies in our diet, and I had a lot of vegetables that needed to be used from the CSA.

veggies for slaw

I used half of a medium head of cabbage, two carrots, one daikon radish (not in the original recipe), one onion, a scallion (another addition, mostly because I wanted some green in the slaw), and a dried guajillo chile (a substitution for the chiles de arbol.) These all got thinly sliced or shredded and tossed in a big bowl with vinegar, sugar, salt, and oregano.

curtido

You may notice I used the seeds from the chile – guajillos are a pretty mild chile, so keeping the seeds added just a touch of heat. While the slaw marinated in the fridge, I made the masa dough, which is ridiculously easy, just masa and water.

masa + water = masa cake dough

I was talking to someone at work the other day who is way more experienced in making pupusas than I. She told me that you need to use hot water (not boiling, just hot from the tap) and work the dough a bit, so that it becomes soft. Not having these directions may have been the reason I wasn’t able to stuff the beans into the pupusas. The dough wasn’t elastic enough to encase such a soft filling. Anyway, after giving up on the stuffing attempts, I just took balls of masa dough and patted them into discs.

formed masa cakes

Then I browned them on each side in a skillet. Another tip the woman at work gave me was to put a little oil on your hands when you are forming the masa cakes, so there is just a touch of oil on them for cooking.

masa cakes getting golden

Then all I had to do was slather some black beans on the cakes and top them with curtido. Yum! To be honest, I tend to be pretty skeptical of vegan food. I love dairy, and cooking without it or eggs just sounds like deprivation to me. But these were really tasty. The refried black beans were rich and salty enough to add flavor to the masa cakes, and played off the crunch, tangy flavor, and slight heat of the slaw. I think they were as good as the original cheese version. That said, I think the next time I make them I will use beans and cheese. 🙂

Vegan Pupusas with Refried Black Beans and Curtido adapted from Saveur

1⁄2 cup cider vinegar
3 tsp. sugar
2 tsp. oregano
1 guajillo chile (or other chile you like), chopped
2 medium carrots, peeled and grated
1 medium-large daikon radish (or several small radishes), peeled and shredded
1 yellow onion, thinly sliced
1 scallion, thinly sliced
1⁄2 head green cabbage, shredded
Kosher salt, to taste
1 can refried black beans
2 cups masa harina
1 3/4 cups hot water
vegetable oil

Combine vinegar, sugar, oregano, vegetables, and chile in a large bowl and add salt to taste. Refrigerate while you prepare the masa cakes.

Stir together masa harina and water until a dough forms. Knead dough a bit. If dough is dry and cracks when you handle it, add a bit more water. Put a little vegetable oil on your hands and form golfball sized balls of dough. Pat each ball into a disc shape. Cook the cakes in a non-stick skillet over medium-high heat until lightly browned on each side, approximately 10-12 minutes. Depending on the size of your skillet, you may need to do this in several batches. Keep finished cakes warm in a low oven until the others are ready. To serve, spread each cake with a generous layer of black beans (you can warm the beans if you like, but I didn’t bother) and top with plenty of curtido.

Read Full Post »

components

Soon I will stop apologizing about my poor quality photos. You know, as soon as I either get better lighting in my apartment (especially the kitchen) or get a new camera. Hopefully the latter. But for now, sorry for these blurry, yellowy photos. They do not do this tasty dish justice. Hopefully the images won’t prevent you from trying to make these fritters, because they are delicious.

As I mentioned in the post about the dinner I hosted, I made artichoke fritters from Tyler Florence’s, Dinner at My Place. The recipe in the book includes a simple and lovely batter, along with not entirely clear instructions for taking whole artichokes and turning them into slices of raw artichoke heart. Let’s just say that while the artichoke fritters were tasty, I did not skillfully butcher the artichokes. And it felt like a waste to have to discard all those lovely fresh leaves, but I don’t think there is a way to avoid it with the recipe.

After making the dish, I had a lot of batter left over. I wasn’t sure whether it would keep, but it seemed worth a try. A couple days later, we got our first zucchini of the summer in our CSA share, and I decided to try making zucchini fritters. Unlike the artichoke version, this iteration was super simple and came together in no time. The batter was a tad dry after sitting in the fridge, so I added a splash of hard cider, sliced up the zucchini, and heated some canola oil on the stove.

frying up

Then it was simply a matter of dipping the slices in batter, dropping them in the oil, flipping them once, and cooking until both sides were lovely and golden brown.

ready for nomming

I put them on paper towels layered over a brown paper bag to drain, salted them, and they were ready to eat. And I pretty much ate a bunch of them for dinner that night. They were good plain, but they were wonderful with a bit of malt vinegar or balsamic cream (a mixture that has not actual cream but consists of reduced balsamic vinegar and grape must.)

zucchini fritters, two ways

I am away from home for the weekend, so I can’t post the recipe for the batter at the moment. I will try to remember to add it when I get home, so you folks can make all sorts of battered, fried, tasty items (or you can buy the cookbook, which has lots of lovely photos and mouth-watering recipes.) I plan to try this batter with a number of other items, fish, more veggies, and even squash blossoms, if I can get my hands on some.

Read Full Post »

dinner in the back yard
I really like entertaining. I love the challenge of figuring out a menu that fits my skills, the food preferences of my guests, and the season. It makes me happy when friends are gathered around happily chowing down and chatting away. There’s that wonderful alchemy that happens when you combine good food and good company, and that is what I hope for in a dinner party.

This weekend that’s exactly what I got. I hadn’t had people over for a meal in ages. Seriously, I think it had been many months. Yikes! I definitely hope to host dinner parties much more frequently in the months ahead. I often host casual dinner gatherings; we might even eat in the living room with plates on our laps. But this time, maybe because it had been so long since I worked the hostessing mojo, I just couldn’t resist putting a little more polish on the evening. So I set up an improvised table (a long piece of plywood over two small tables) in the tiny outdoor space behind my apartment) and decorated it with pink hydrangeas and real linens. It was simple and elegant without being formal. And a heck of a lot cooler than sitting inside that evening!

Summer Sunday dinner menu

That’s what we had for dinner. I didn’t take pictures of the appetizer, artichoke fritters from Tyler Florence’s Dinner at My Place, we ate in the kitchen before sitting down to dinner. They were labor intensive, but tasty. What you see on the plate there is a salad of fennel, green beans, and radishes, pork tenderloin with fresh cherry and chile salsa, and grits with garlic scapes and goat cheese. Everything turned out well, but I was most proud of the pork, since I rarely cook meat. That cherry salsa was a sweet-savory delight, and it was also lovely over the Finnish frying cheese that I grilled for the vegetarian in the group.

peach and almond trifle

For dessert we had a trifle with peaches, almond sponge cake, and whipped cream. I had intended to have an amaretto flavored custard in the trifle, but I totally failed in the process of making the custard and it didn’t seem necessary enough to warrant using another 9 eggs. The trifle was yummy without it, but one of these days I am going to make custard, darn it!

I had a blast cooking for a few of my friends, and I hope I’ll have more of these dinner party menus to post soon.

Read Full Post »

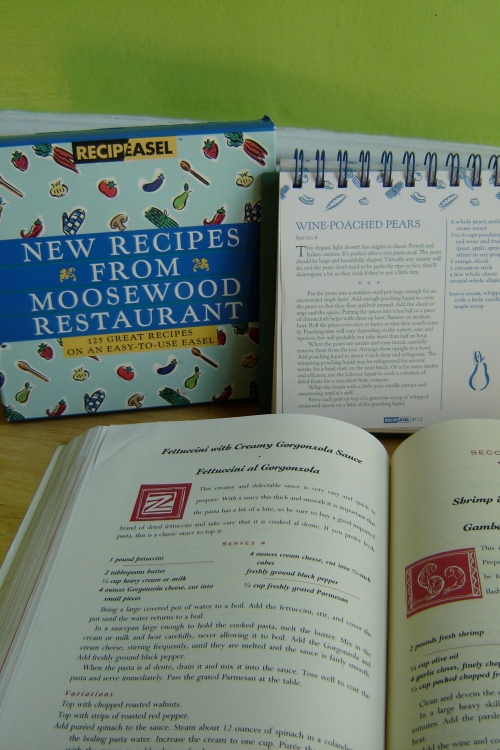
I kind of took the easy way out with this first foray into “Cooking by the Book”.  These two dishes are not complicated.  But, boy howdy, are they yummy!  The Fettucine with Creamy Gorgonzola Sauce is from my Sundays at Moosewood cookbook, and the WIne-Poached Pears come from New Recipes From Moosewood Restaurant.

I picked the pasta recipe first (from the Italy section of Sundays at Moosewood, which has sections from all sorts of regional and ethnic cuisines), and what goes with bleu cheese? Fruit and wine, of course! So the wine poached pears were a no-brainer. Guess I wanted easy, gourmet comfort food.

Both dishes are simple, but the pears take some time, so I started with them.  I only used 4 pears, because, much as I love leftovers, half a dozen poached pears seemed excessive for one person.  I peeled the pears and put them in a pot with a sliced orange (the recipe doesn’t say whether to peel the orange, so I took the sangria approach and left the peel on), a cinnamon stick, and some whole cloves (I think I grabbed five or six).  I didn’t have any whole allspice, so I just skipped that bit of the recipe.

Then a cup or so of apple juice and about 4 cups of red wine went in.  I brought the contents to a boil and then let them simmer.  According to the recipe the cooking time varies depending on size and variety of pear, but “will probably not take more than half an hour.”  I didn’t time them, but I think it was more like an hour before my pears were “tender and rosy”.

I let the pears cool, while I made the pasta for my entree.  The recipe suggests serving the pears with lightly sweetened whipped cream, but since the pasta dish called for cream, bleu cheese, and cream cheese, I figured I could, and should, skip the cream for dessert.  Honestly, the pears didn’t need any additions, but I will get to the final verdict later.

The Fettucine with Creamy Gorgonzola Sauce is ridiculously easy.  It’s definitely going in my weeknight repetoire, since it barely takes longer to make the whole dish than it does to prepare the pasta.  While the pasta water came to a boil, I cut the bleu cheese and cream cheese into chunks.

I had picked a “gorgonzola dolce” at the store, and it worked fine, but I think a more typical, saltier, more pungent gorgonzola would have been even better.  I also used reduced fat cream cheese, since that’s what I had in the fridge.  Once the pasta was in the boiling water, I melted the butter in a saucepan and added the cream with the heat on low to prevent boiling.

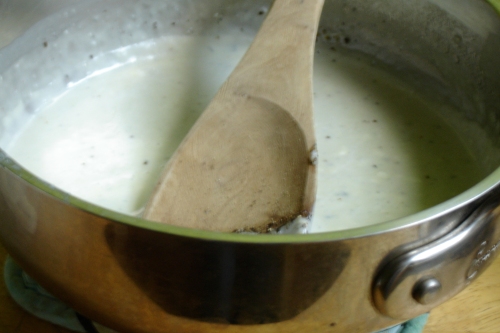
Then the cheeses were added, and I stirred the pot regularly to incorporate the melting cheese.

Don’t forget to also stir the cooking pasta once in a while, so it won’t stick to the bottom of the pot or stick together too much. While the sauce and pasta were cooking, I also chopped and toasted some walnuts to go with the dish, which is one of the variations mentioned in the cookbook.  Finally the sauce was all melted and smooth, and I added a generous amount of coarsely ground black pepper.

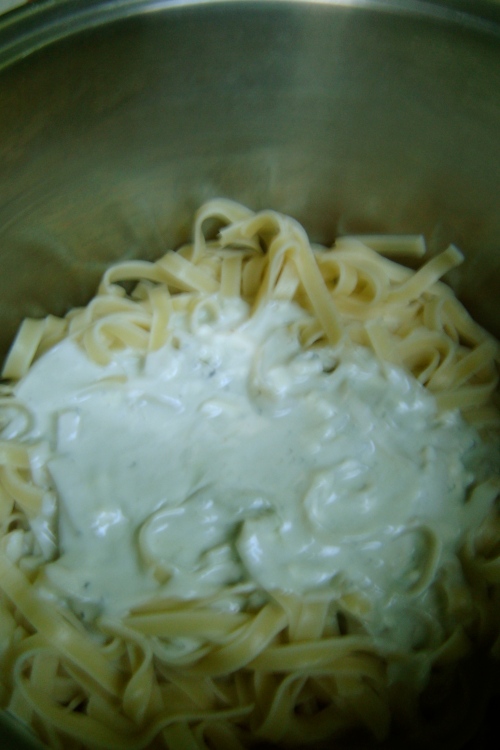
Once the pasta was perfectly al dente (which I never seem to manage, so hooray!), I drained it and put it back in the pot with the gorgonzola sauce.

A quick stir, and the pasta was ready to go.  I put some on a plate and topped it with a sprinkling of the toasted nuts.  The recipe calls for adding parmesan at this point, but I forgot.  Oops.  No great loss, though.

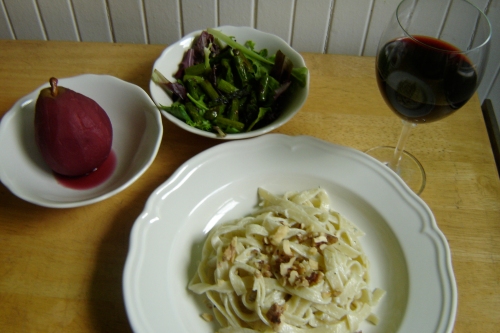
I rounded out the meal with a salad of mixed greens, sauteed asparagus, and lemon vinaigrette, which kept me from feeling too guilty about that creamy, cheesy pasta.  The pasta was luscious, and the crunchy walnuts added just the right amount of contrast.  The dish packed a lot of flavor for something so quick and simple.  And the poached pear was a refreshing end to the meal.  Why don’t I make poached pears all the time?  It was sweet, but not too sweet, with the wine and spice flavors adding to, but not hiding the yummy pear taste.  It didn’t need any whipped cream to be delicious.

I call both dishes very successful!  Maybe next time I do a Cooking By the Book post I will tackle something a little more ambitious, but if you make either of these dishes, I don’t think you’ll mind their simplicity one bit.

Fettucine with Creamy Gorgonzola Sauce (from Sundays at Moosewood Restaurant), serves 4

1 pound fettucine

2 tablespoons butter

1/2 cup heavy cream or mikl

4 oz. Gorgonzola cheese, cut into pieces

4 oz. cream cheese, cut into cubes

freshly ground black pepper

1/2 cup grated parmesan cheese

1 cup chopped walnuts (optional)

Bring a large covered pot of water to a boil.  Add the fettucine, stir, and cover the pot until the water returns to a boil.  In a saucepan large enough to hold the cooked pasta, melt the butter.  Mix in the cream or milk and heat carefully, never allowing it to boil.  Add the gorgonzola and cream cheese, stirring frequently, until they are melted and the sauce is fairly smooth.  Add freshly ground pepper.  When the pasta is al dente, drain it and mix it into the sauce.  Toss well to coat the pasta and serve immediately topped with chopped walnuts and parmesan.

Wine-Poached Pears (from New Recipes from Moosewood Restaurant), serves 6

6 pears, peeled with stems intact

5 to 6 cups poaching liquid: red wine and fruit juice (pear, apple, apricot, or other) in any proportion

1 orange sliced

1 cinnamon stick

a few whole cloves

several whole allspice

heavy cream, whipped with a little vanilla and maple syrup

Put the pears into a stainless steel pot large enough for an uncrowded single layer.  Add enough poaching liquid to cover the pears so they float and bob around.  Add the sliced orange and the spices.  Simmer on medium heat.  Roll the pears over once or twice so that they poach evenly.  Poaching time will vary depending on the variety, size, and ripeness, but will probably not take more than half an hour.  When the pears are tender and rosy-tinted, carefully remove them from the pot.  Arrange them upright in a bowl.  Add poaching liquid to about 1 inch deep and refrigerate.  Whip the cream with a little vanilla extract and syrup until stiff.  Serve each pear on top of a generous scoop of whipped cream and spoon on a little poaching liquid.

Read Full Post »

My latest kitchen experiment was not as successful as some.  Why can’t I get flatbread style pizza right?  The first time I ever made it, with basically the same method I used for this pizza, was perfect.  Since then, I just can’t quite get the crust right.  Guess I will have to keep trying.

With some hot Italian sausage in the fridge, I decided to make a white pizza and balance the richness with some greens.  My original vision was to top the pizza with sausage and onions and then add some lightly dressed arugula on top, kind of like the pear and gorgonzola pizza at California Pizza Kitchen.  Maybe the fact that the grocery store didn’t have any arugula or that I was out of onions should have prompted me to skip this project, but I just changed plans and ended up with a pizza that was fine, but nothing to write home about.

With grilled or flatbread style pizza, the dough is cooked partway before you add any toppings.  Anything you want really cooked as a topping, then, needs to be cooked in advance.  So I browned up the sausage (I often use hot Italian turkey sausage, when I can find it, but this was chicken), while the oven was preheating.

Meanwhile, I washed the collard greens, removed the stems, and chopped them into strips.

After removing the sausage (for pork sausage, you’d probably want to drain it on paper towels or a brown paper bag, but this was pretty lean) I added a little butter to the same pan and sauteed the collards until they were just starting to get tender.

While the sausage and greens were cooking, I made the white sauce.  I melted about a tablespoon or so of butter and added a bit of flour to make a roux, which I cooked until it began to look just a bit golden.

To that I added about a cup of milk, whisking to make it nice and smooth.  As it cooked I added black pepper, ground mustard, minced garlic, and a bit of prepared Dijon mustard, to take the sauce beyond a basic white sauce.

Once the sauce was thickened, I took it off the heat and set it aside until I was ready to assemble the pizza.

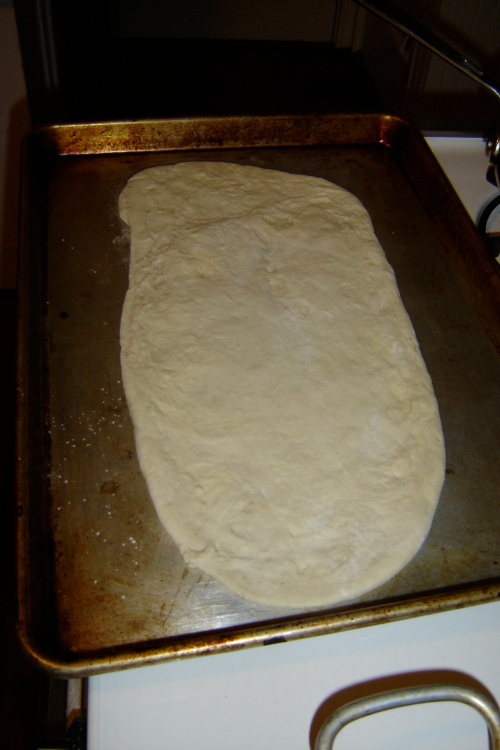
While the oven was preheating, I put a sheet pan in to heat up, and rolled out the pizza dough into a long, oval-ish shape.  Actually, I tried stretching and pressing the dough into shape by hand, but it was too elastic and kept shrinking back on me.  The rolling pin and some persistence finally did the trick, and I put the thin crust on the hot baking sheet, before putting it back in the oven (450 degrees, which in retrospect probably wasn’t hot enough for what I was going for.)

After about 5 minutes in the oven, I turned the crust over and let it bake for another 5 minutes or so, until a few places were just barely starting to brown.  At that point, I pulled the pan out of the oven and started adding toppings.

First on was a layer of the mustard and garlic infused white sauce.

That got topped with a bit of mozzarella, a scattering of sausage, and a bunch of collards.

Then more mozzarella went on top to finish it off.

Into the oven for about 15 minutes, and it came out melty and golden brown in a few spots.

Looks pretty tasty, right?  And it was good, but not great.  The main problem was the texture of the crust.  It was firm, but not crispy, and still managed to be kind of doughy on the inside.  Not the crisp exterior and chewy interior I was going for.  I think a higher baking temperature would help.

I really liked the white sauce, though, and it was nice with the collards and sausage.  The whole was a little rich, though, and would have benefited from a little lemon juice or cider vinegar (perhaps stirred in with the greens.) I have leftovers of sausage, greens, and the white sauce, so I am contemplating a polenta or pasta dish with those.  I’ll let you know if it turns out better than the pizza.

Since this dish wasn’t a triumph, nor did I measure a thing as I made it, I am not including a recipe.

Read Full Post »

I have been so lazy about cooking lately.  There’s been a lot going on at work, and singing and various social things have kept me busy in most of my off hours.  So I have been eating out a lot, or making meals out of an assemblage of snacks.  Tonight I actually shopped and cooked a lovely (though admittedly simple) meal, despite the fact that I was feeling awfully tired after work.  I felt like I could have fallen asleep in the shuttle to the parking lot, yet stopping for fast food on the way home just didn’t appeal.

Instead, I decided randomly to make fish baked in parchment (or en papillote if we want to get really fancy.)  I am not sure what came over me.  I rarely cook fish, and I had never cooked in parchment before, but why not?  Whole Foods had some wild Coho salmon (Marine Stewardship Council certified sustainable – woot!) on sale, so I bought half a pound.  I wanted to make something that was simple and seasonal (it actually felt like spring today – yahoo!), so I also picked up lemon, leeks, and red potatoes. 

When I got home, I preheated the oven and chopped the leeks.  Leeks are often full of sand and dirt, so after chopping them, I throw them into a big bowl of cold water and swish them around.  Then I let them sit for a few minutes, so that the grit can fall to the bottom of the bowl.  Then you can scoop out the leeks.

While the leeks were soaking, I thinly sliced the red potatoes and a lemon, reserving the ends of the lemon for juice.   Once the leeks were drained, everything was ready for packaging.

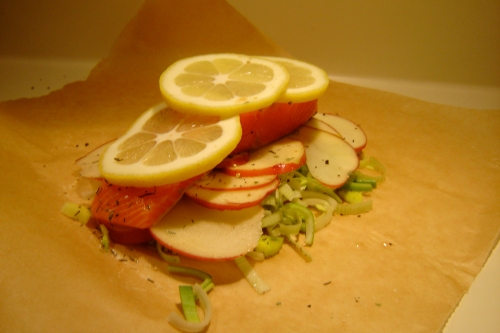
I laid out two pieces of parchment (I kind of like the unbleached, brown parchment that I happened to grab at the store) and layered the leeks, potatoes, salmon, and lemon slices, as in the picture at the top of the post.  I seasoned each layer with salt and pepper, and added a little thyme, tarragon, and fenugreek on the salmon.  Then I drizzled the whole pile with olive oil, before folding the packages.

After folding the paper in half over the ingredients, you have to start at a corner by the crease and roll or fold the edge of the paper up little by little all the way around the food.  It’s a little hard to describe, but it’s easy to do, once you get the idea.

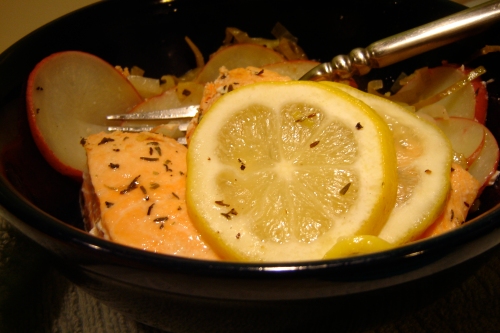
I baked the packages for about 25 minutes, and boy was I ready to eat!  I tore open one of the packages and could immediately smell the lemon and spices, and I was eager to dig in.

Man, this was delicious!  It was bright and springy and somehow delicate and flavorful at the same time.  The lemon was the predominant flavor, but it didn’t overwhelm the leeks and seasonings.  I scarfed the whole thing down in no time, and I am really glad I decided to make two servings, so I have leftovers to look forward to tomorrow.

I am kind of proud of how outside the norm of my cooking this dish is.  What I tend to do best in the kitchen are hearty dishes, stews, pastas, polenta, and the like.  This is unusually delicate, though not at all fussy and still satisfying.   And it has the advantages of very little cleanup (a cutting board and knife, the bowl for cleaning the leeks, and the barely soiled baking sheet) and short enough prep and cooking time to make it a really good weeknight option.  It’ll definitely stay in my spring rotation. 

Spring Salmon in Parchment (serves 2) 

1 small leek                                                       1/2 tsp. thyme

2 medium red potatoes                                  1/4 tsp. tarragon

1 lemon                                                              1/2 tsp. fenugreek

2 3-4oz. fillets of salmon                               olive oil

salt and pepper                                                parchment paper

Preheat oven to 350 degrees.  Trim off root end and dark green leaves from leek.  Cut in half lengthwise and slice thinly.  Place sliced leeks in a bowl of cold water and stir to loosen any dirt or sand.  Let sit for a few minutes, then remove leeks and drain.  Thinly slice potatoes and lemon.  Sprinkle salmon fillets with thyme, tarragon, and fenugreek.  On one half of a piece of parchment paper layer half the chopped leeks, half the sliced potatoes, one salmon fillet, and half the lemon slices, seasoning each layer with a pinch of salt and pepper.  Repeat with remaining ingredients on another piece of parchment.  Drizzle olive oil over ingredients.  Fold parchment over and pleat along edges to close.  Place parchment packets on a baking sheet and bake for about 25 minutes.

Read Full Post »